A <a href="https://cottageventure.com/security-camera-discounts/”>security camera in the wrong spot is about as useful as a screen door on a submarine. Homeowners spend hundreds, sometimes thousands, on high-resolution cameras with night vision, motion detection, and cloud storage, only to mount them where they can’t see the porch pirate swiping packages or the side gate left ajar. Strategic placement outperforms pixel count every time. This guide walks through proven camera locations, mounting heights, and common mistakes that compromise coverage. Whether installing wired cameras or wireless units, these principles apply to any system and any property layout.
Table of Contents
ToggleKey Takeaways
- Home security camera placement strategy matters more than camera specifications—a 1080p camera in the right location captures identifying details better than a 4K camera aimed at a brick wall.
- Mount outdoor cameras 7 to 9 feet high at entry points and angled slightly downward to capture faces at eye level without the steep overhead perspective that obscures features.
- Cover front doors, side and back doors, driveways, garage doors, and side yards to eliminate blind spots and coverage gaps that burglars and package thieves exploit.
- Position cameras to capture approach paths where people walk toward the lens, as this yields better facial identification and usable footage for law enforcement compared to perpendicular or overhead angles.
- Avoid common placement mistakes including mounting too high, ignoring lighting conditions that cause backlit silhouettes, overlooking obstructions, and forgetting to weatherproof outdoor cameras with IP65+ ratings.
- Supplement infrared night vision with motion-activated LED floodlights and ensure cameras aren’t directly under bright lights, as proper lighting determines image quality more than resolution.
Why Strategic Camera Placement Matters More Than Camera Quality
A 4K camera aimed at a brick wall captures nothing but texture. Meanwhile, a modest 1080p camera covering the front walkway from the correct angle records faces, license plates, and identifying details.
Placement determines field of view, the area visible in the frame. A camera mounted too high looks down on the tops of heads. Too low, and it catches knees and shopping bags. The wrong angle misses entry points entirely or gets blinded by headlights and porch lights.
Coverage gaps are the second reason placement trumps specs. Burglars and package thieves scout properties before acting. They look for blind spots, areas not covered by cameras or windows. A single camera at the front door leaves the back patio, side gates, and garage vulnerable.
Third, strategic placement improves usable footage. Police need clear images of faces, clothing, and getaway vehicles. A camera that only shows a hooded figure’s back doesn’t help investigators. Positioning cameras to capture approach paths, where people walk toward the lens, yields identifying details that overhead shots never will.
Finally, proper placement reduces false alerts. Motion-detection zones pointed at busy streets or swaying tree branches trigger constant notifications. Cameras aimed at controlled areas, walkways, doorsteps, driveways, capture relevant activity without inbox spam.
Essential Outdoor Camera Locations for Maximum Coverage
Outdoor cameras form the first line of defense. They deter opportunistic crime and document anyone approaching the home.
Front Door and Entry Points
The front door accounts for 34% of break-ins, according to data compiled by security researchers. A camera here is non-negotiable.
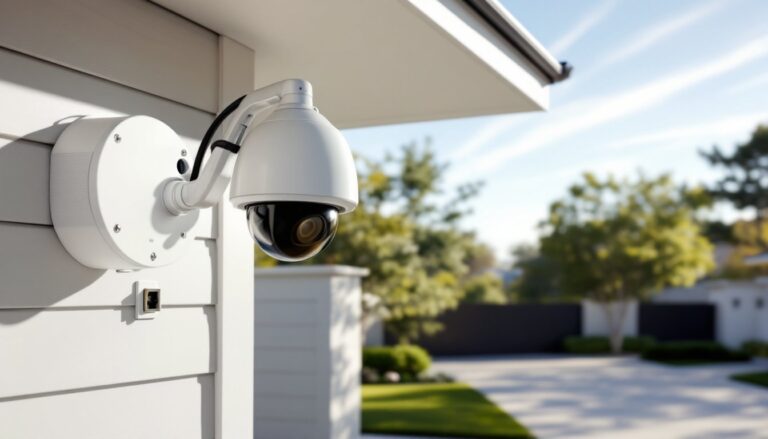
Mount the camera 7 to 9 feet high, angled slightly downward to capture faces at eye level. This height stays out of easy reach but avoids the steep downward angle that only shows the tops of heads. Position it to cover the entire porch, including the approach path from the sidewalk or driveway.
Doorbell cameras work well here, offering two-way audio and package monitoring. For standalone cameras, a weatherproof housing rated IP65 or higher protects against rain and dust. Ensure the lens isn’t facing directly into afternoon sun, which creates glare and washes out footage.
Cover side and back doors the same way. Many homeowners focus on the front and forget secondary entries. Intruders often test back doors first, knowing they’re less visible from the street. A wired PoE (Power over Ethernet) camera provides reliable power and eliminates battery changes, but wireless units work if running cable through exterior walls isn’t feasible. Proper camera installation techniques ensure weatherproof connections and stable mounts.
Driveway, Garage, and Side Yards
Driveways capture vehicle arrivals and departures. A camera mounted on the garage soffit or eave, aimed down the length of the driveway, records license plates and driver-side windows. For night recording, infrared LEDs or supplemental motion-activated lights improve visibility. Some cameras struggle with headlight glare: position the camera off to the side rather than directly in line with approaching headlights.
Garage doors are common entry points, especially when left open during the day. A camera covering the garage interior, mounted inside near the ceiling, facing the vehicle bay and door, documents anyone entering. If the garage houses tools, bikes, or expensive equipment, this camera pays for itself.
Side yards are blind spots on many properties. Fences and gates create concealed paths from front to back. A camera at each side gate, mounted high on the house or fence post, eliminates these gaps. Motion-activated recording saves storage space and flags unusual activity. When evaluating camera systems, comprehensive smart home security setups integrate these cameras with lighting and alarm triggers.
Best Indoor Camera Placement for Home Security
Indoor cameras serve two purposes: monitoring entries when alarms are bypassed and keeping an eye on high-value rooms.
Place a camera in the main hallway or staircase landing if the layout allows. This central position captures movement between rooms and records anyone moving through the home. Mount it in a corner near the ceiling for the widest field of view.
The living room or any room with street-facing windows benefits from a camera. If an intruder smashes a window, the camera documents the entry and the person’s appearance. Angle the camera toward the window and main walkways, not toward walls or furniture.
For homes with valuable collections, safes, or home offices with sensitive documents, a dedicated camera in that room adds a layer of documentation. Pan-tilt-zoom (PTZ) cameras offer flexibility but cost more and require occasional adjustment. Fixed cameras with wide-angle lenses (110° to 130°) cover large rooms without moving parts.
Avoid bathrooms and bedrooms unless there’s a specific need, such as monitoring a bedridden family member. Privacy concerns and local laws often restrict recording in spaces with an expectation of privacy. Some states require two-party consent for audio recording, so disable microphones or post clear notices if audio is enabled.
Test footage before finalizing placement. Walk through the room while reviewing the live feed on a phone or monitor. Adjust the angle if furniture blocks sightlines or if the camera only captures half the entry point. Independent reviews from sources like CNET’s smart home testing provide insight into camera field-of-view specs and real-world performance.
Common Camera Placement Mistakes to Avoid
Mounting too high is the most frequent error. Cameras placed at rooflines or second-story eaves create steep downward angles that miss faces. Stick to the 7-to-9-foot range for ground-level entries.
Ignoring lighting conditions is the second. A camera aimed east catches harsh morning sun: one facing west gets blinded at sunset. Backlit subjects, people standing in front of bright windows or porch lights, appear as silhouettes. Position cameras so light sources are behind or beside the lens, not in the frame.
Overlooking obstructions wastes coverage. Tree branches, porch columns, hanging plants, and even spiderwebs blur or block the lens. Trim vegetation and check camera views seasonally as plants grow.
Forgetting about Wi-Fi range hampers wireless cameras. Exterior walls, metal siding, and distance from the router weaken signals. If a camera drops offline frequently, add a Wi-Fi extender or switch to a wired PoE system. Some advanced professional security systems include dedicated network infrastructure to avoid connectivity issues.
Skipping weatherproofing on outdoor cameras leads to early failure. Use cameras rated IP65 or IP66 for rain and dust resistance. Seal cable entry points with silicone caulk to prevent moisture intrusion. If mounting to vinyl siding, use a mounting block to create a flat, stable surface and avoid stress cracks.
Placing cameras within reach invites tampering. A camera mounted at eye level on a porch post is easy to disable or spray-paint. Height and protective housings deter interference.
Height, Angle, and Lighting Considerations for Optimal Footage
Mounting height of 7 to 9 feet balances accessibility and coverage. Ladders are needed for installation and maintenance, but the camera stays out of casual reach. For second-story windows or high eaves, angling the camera downward at 15 to 30 degrees maintains face-level capture without the steep overhead perspective.
Horizontal angle matters as much as height. A camera aimed straight down a walkway (toward approaching subjects) captures better facial detail than one mounted perpendicular (side views). For corner installations, a 130° wide-angle lens covers two walls from a single position, reducing the number of cameras needed.
Lighting determines image quality more than resolution. Infrared (IR) night vision works in total darkness but has limited range, typically 30 to 100 feet depending on the camera. Supplement with motion-activated LED floodlights to trigger visible light when someone approaches. This improves color footage and acts as a deterrent.
Avoid placing cameras directly under bright lights. The lens adjusts exposure for the bright area, darkening everything else. Mount lights beside or above the camera, not in the frame.
Glare and reflections ruin footage. Cameras behind windows pick up reflections from interior lights and IR LEDs bouncing off glass. For indoor cameras monitoring through windows, disable IR, turn off nearby lights at night, and press the camera lens flush to the glass using a mount or suction cup.
Test night footage after installation. Walk the coverage area in darkness and review recorded video. Adjust angles or add lighting if faces aren’t identifiable. Recent product testing from Good Housekeeping highlights cameras with superior low-light performance, which can reduce the need for supplemental lighting.
Finally, secure the power and data cables. Exposed wiring is a weak point. Run cables through walls or conduit where possible. For wireless cameras, ensure batteries are accessible for replacement but not easily visible to passersby.