Motion-activated camera lights combine two essential home security tools into one hardworking device. Instead of installing a floodlight here and a security camera there, homeowners get both, plus the benefit of coordinated detection and deterrence. These hybrid units detect movement, trigger bright illumination, and capture video simultaneously, creating a powerful barrier against package thieves, trespassers, and late-night wildlife raids on the garbage cans. Whether wiring into an existing junction box or mounting a battery-powered unit above the garage, understanding how these systems work and what features matter most will help DIYers choose and install the right setup for their property.
Table of Contents
ToggleKey Takeaways
- A motion light with security camera combines PIR motion detection, LED floodlights, and video recording in a single device, eliminating the need for separate fixtures and wiring installations.
- Proper placement at 8–10 feet high with a 130–160-degree field of view and corner positioning maximizes coverage and detection effectiveness while minimizing false alarms.
- Motion-activated camera lights reduce energy consumption by 70% or more compared to always-on lighting and provide automatic, time-stamped evidence of package theft or vandalism.
- Choose cameras with at least 1080p resolution, customizable activity zones, two-way audio, and reliable Wi-Fi connectivity to ensure practical functionality and reduced notification fatigue.
- DIY installation is straightforward for battery-powered models but requires electrical expertise for hardwired units; always verify local codes, use GFCI protection, and test motion detection after setup.
- Clean the lens and PIR sensor quarterly and monitor battery health (2–6 months per charge in high-traffic areas), with solar models requiring sunny exposure for reliable performance.
What Is a Motion Light Security Camera and How Does It Work?
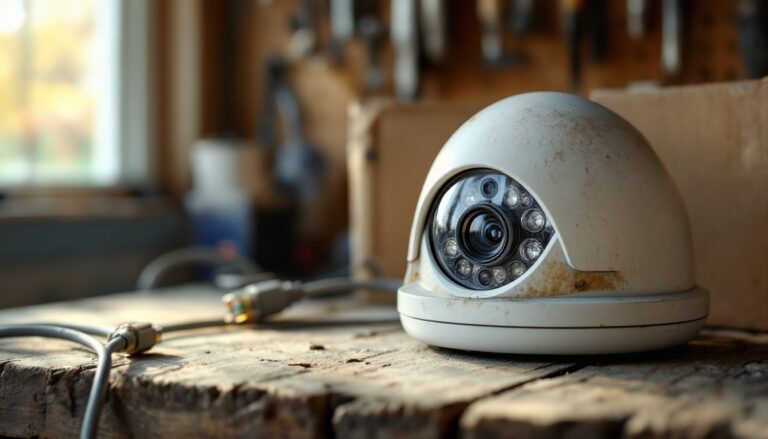
A motion light security camera is a single fixture housing PIR (passive infrared) motion sensors, LED floodlights, and a video camera with onboard or cloud storage. The PIR sensor detects heat signatures from moving objects, people, animals, vehicles, within a set detection zone, typically 20 to 30 feet in range and 180 degrees in arc, depending on the model.
When motion triggers the sensor, the system activates two responses: the LED floodlights (usually 1,000 to 3,000 lumens) illuminate the area, and the camera begins recording. Most units record continuously for a preset duration (30 seconds to several minutes) or until motion stops. Video feeds to a companion app via Wi-Fi, where users receive push notifications and can review footage in real time or playback.
Power options vary. Hardwired models connect to a standard 120V electrical box, the same junction used for traditional outdoor floodlights. Battery-powered or solar-rechargeable versions offer flexibility for locations without existing wiring, though they require periodic charging or adequate sun exposure. Some hybrid models combine hardwiring for the light with rechargeable batteries for the camera, balancing reliability and ease of retrofit.
Understanding the detection logic matters: PIR sensors work by sensing temperature differences. They’re most effective when motion crosses the sensor’s field of view horizontally rather than approaching head-on. Adjusting the detection sensitivity and activity zones in the app reduces false triggers from passing cars, swaying branches, or the neighbor’s cat.
Top Benefits of Installing Motion-Activated Camera Lights
Dual-function efficiency is the headline benefit. One device, one installation, and one power source replace what used to require separate fixtures, separate wiring, and separate troubleshooting. For homeowners adding security to a dark driveway, side gate, or backyard patio, that consolidation saves time, materials, and electrical box real estate.
Deterrence through visibility is the second advantage. Burglars and opportunistic thieves avoid well-lit, monitored areas. The sudden flood of light, combined with a visible camera lens, signals that the property is protected. Many models include two-way audio, allowing homeowners to speak through the camera, useful for telling delivery drivers where to leave a package or warning off someone lingering near the front door.
Evidence capture becomes automatic. Unlike standalone motion lights that only illuminate, these systems record what triggered the sensor. If a package disappears, a car gets keyed, or someone vandalizes the mailbox, the footage provides time-stamped evidence. Cloud storage plans (typically $3 to $10/month) archive clips for 30 to 60 days: local storage via microSD card is free but requires manual management.
Energy efficiency is another practical upside. LED bulbs in these fixtures draw 15 to 40 watts, dramatically less than older halogen floodlights, and only activate when needed. Compared to leaving a porch light on all night, motion-triggered lighting cuts electricity use by 70% or more. Some units allow scheduled “always-on” modes for specific hours, blending security with everyday convenience.
Key Features to Look for When Choosing Your System
Not all motion light cameras deliver the same performance. Prioritizing the right specs ensures the unit matches the installation site and security goals.
Camera Resolution and Night Vision Quality
1080p (Full HD) is the baseline for usable footage in 2026. It captures enough detail to identify faces, license plates, and package labels within 15 to 20 feet. 2K or 4MP cameras offer sharper images, helpful for larger yards or longer driveways where subjects may be farther from the lens. Budget models with 720p resolution struggle with detail at distance and should be avoided unless covering a small, close-range area like a side door.
Night vision comes in two forms: infrared (IR) and color night vision. IR uses invisible LED emitters to illuminate the scene, producing black-and-white footage. It’s effective and power-efficient. Color night vision relies on low-light sensors or integrated spotlights to maintain color footage after dark, useful for identifying clothing, vehicle color, or other distinguishing features. Some units, like models tested by Tom’s Guide, combine both, switching modes based on ambient light.
Field of view (FOV) also matters. A 130- to 160-degree FOV covers most entryways and driveways without blind spots. Wider isn’t always better, ultra-wide lenses can distort edges and reduce detail at the center.
Smart Home Integration and Mobile Alerts
Look for compatibility with Alexa, Google Assistant, or Apple HomeKit if voice control or automation routines are part of the home ecosystem. Integration allows commands like “Show me the front door camera” on a smart display or triggering lights when other sensors detect activity.
Customizable activity zones let users define which areas trigger recording. For example, exclude the sidewalk to avoid alerts every time a jogger passes, but keep the driveway and porch active. This granular control, now standard on most systems reviewed by CNET, cuts down on notification fatigue.
Two-way audio quality varies. Cheap units produce tinny, echo-prone sound. Better models include noise cancellation and clear microphones, making conversations through the app practical for greeting guests or coordinating with delivery personnel.
Subscription vs. local storage is a deciding factor. Cloud plans offer convenience and off-site backup, but they’re recurring costs. Units with microSD slots (supporting 32GB to 128GB cards) provide free, on-device storage, ideal for budget-conscious DIYers willing to swap cards periodically.
Best Placement Strategies for Maximum Coverage
Height and angle dictate detection effectiveness. Mount the fixture 8 to 10 feet above ground. Too low, and the PIR sensor’s range shortens: too high, and faces become hard to identify. Aim the camera slightly downward, capturing a subject’s face and torso at typical standing height, not just the top of their head.
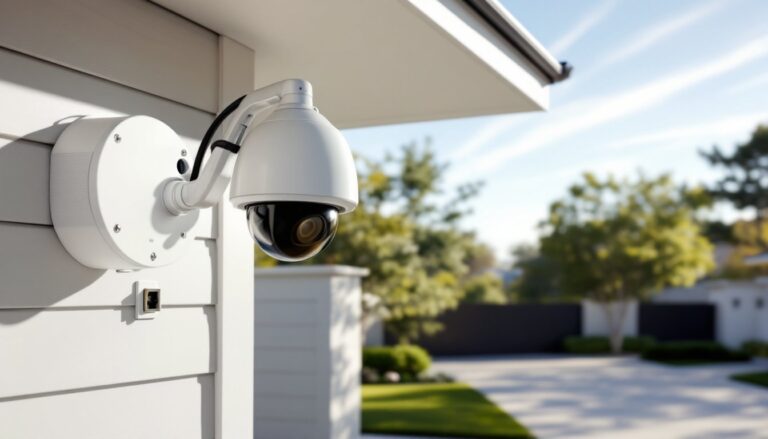
Corner installations maximize coverage. Placing a unit at the corner of a garage or house covers two walls and the intersection, reducing the number of cameras needed. For large properties, multiple units create overlapping zones, eliminating blind spots where someone could approach undetected.
Avoid direct heat sources. PIR sensors can false-trigger near HVAC vents, dryer exhausts, or anything that emits fluctuating heat. Similarly, mounting directly under an eave that reflects sunlight can cause midday false alarms as surfaces heat and cool.
Wi-Fi signal strength is critical for app-connected cameras. Test signal at the proposed installation site before mounting. If the connection is weak, consider a Wi-Fi extender or a mesh network node nearby. A camera that can’t reliably upload clips or stream live is just an expensive motion light.
Weatherproofing and obstructions round out placement considerations. Ensure the unit’s IP rating (IP65 or higher) suits the climate. In coastal or high-humidity areas, corrosion-resistant housings last longer. Trim back tree branches and shrubs that could obstruct the lens or sway into the detection zone, triggering endless false alerts. Comparing different security light options can help homeowners understand which fixtures work best in specific outdoor conditions.
DIY Installation Tips for Homeowners
Safety first: Turn off power at the breaker before working on any hardwired fixture. Use a non-contact voltage tester to confirm the circuit is dead. Wear safety glasses and work gloves, especially when drilling into masonry or working above shoulder height on a ladder.
Replacing an existing floodlight is the simplest install. Most motion light cameras use a standard junction box mount. Remove the old fixture, verify the box is securely fastened (not loose or wobbly, if it is, reinforce with a fan-rated box or mounting bracket), and connect wires: black (hot) to black, white (neutral) to white, and bare copper (ground) to green or bare. Twist wire nuts clockwise until snug, tug gently to confirm connections, then tuck wires into the box before securing the mounting plate.
New installations require running cable. For outdoor locations, use 14/2 or 12/2 NM-B (Romex) inside walls or conduit-rated THWN wire in weatherproof conduit for exterior runs. Most jurisdictions require a GFCI breaker or GFCI outlet upstream of outdoor lighting circuits per NEC guidelines. Check local codes, some areas mandate permits for new exterior electrical work or require licensed electricians for anything beyond simple fixture replacement.
Battery-powered models skip electrical work entirely. Mount the bracket with stainless steel or coated screws (included with most kits) into wall studs, masonry anchors, or vinyl siding blocks. Ensure the bracket is level: a crooked camera looks unprofessional and skews the detection zone. Charge the battery fully before first use, most take 4 to 8 hours via USB-C.
Wi-Fi setup happens through the manufacturer’s app. Have the router password ready, and complete the pairing process while standing near the camera. Once connected, test motion detection by walking through the zone at different angles and distances. Adjust sensitivity sliders and activity zones until false positives drop and legitimate events trigger consistently.
Maintenance is minimal but matters. Clean the lens and PIR sensor cover quarterly with a soft cloth, dust, pollen, and spider webs degrade image quality and detection accuracy. Check mounting screws annually for tightness, especially after storms or freeze-thaw cycles. For hardwired units, inspect wire connections inside the junction box every few years for corrosion or loosening. Homeowners looking to expand coverage can explore camera installation techniques for adding multiple units across the property.
Battery life varies by usage. High-traffic areas with frequent triggers drain faster: expect 2 to 6 months per charge. Solar models work well in sunny climates but struggle in shaded or northern exposures during winter. Keep a spare charged battery on hand to swap without downtime, and consider scheduling recharges on a calendar reminder.
For those hunting deals, checking current discounts can make upgrading to a higher-resolution model or adding a second unit more budget-friendly. Technology reviewed by outlets like Digital Trends often highlights seasonal price drops on popular models, helping DIYers time purchases for maximum value.