Outdoor security cameras aren’t just for deterring package thieves, they’re peace of mind on a mounting bracket. Whether a homeowner wants to monitor the driveway, side gate, or back porch, installing a camera system is a manageable weekend project for anyone comfortable drilling into siding and running a few cables. Most systems use either PoE (Power over Ethernet) or wireless connections, and both have their quirks. This guide walks through the planning, tools, mounting, wiring, and setup needed to get cameras running without hiring a contractor, assuming the homeowner is ready to climb a ladder and work carefully around electrical boxes.
Table of Contents
ToggleKey Takeaways
- Outdoor security camera installation is a manageable DIY project that requires proper planning of camera placement at 7-9 feet high, away from obstructions, and with access to power or PoE-capable network connections.
- Mount cameras in strategic entry points—front door, back door, garage, and side gates—while angling them downward to capture faces and license plates rather than tops of heads.
- Essential tools for outdoor security camera installation include a cordless drill, ladder, stud finder, level, fish tape, and exterior-rated cables (Cat5e/Cat6 for PoE systems), along with masonry bits for brick or stucco mounting.
- Run cables through exterior walls into an attic or basement using a 3/4″ hole angled downward to prevent water intrusion, then protect exposed outdoor cable with PVC conduit or UV-resistant clips.
- Configure motion detection zones, recording schedules, and notifications through the manufacturer’s app while securing the system with strong passwords and two-factor authentication to protect your network.
- Test the system regularly every few months, clean camera lenses, verify recordings are saving correctly, and enable firmware auto-updates to patch vulnerabilities and maintain optimal performance.
Planning Your Outdoor Security Camera Placement
Good camera placement starts with understanding what needs coverage and what won’t work. A camera pointed at a sunny driveway without considering glare will produce unusable footage by noon. Same goes for mounting too high, faces turn into hats, and license plates disappear.
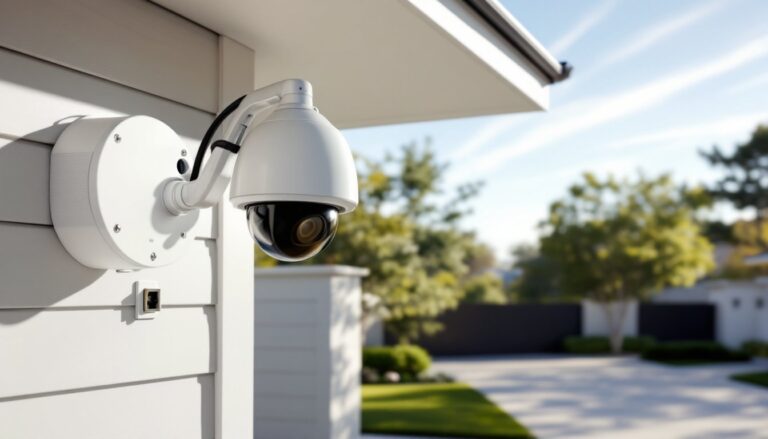
Start by walking the property perimeter. Note entry points: front door, back door, garage, side gates, and ground-floor windows. These are the highest-priority zones. Cameras should be positioned 7 to 9 feet off the ground, high enough to discourage tampering but low enough to capture detail. For driveways or long walkways, angle the camera slightly downward to catch approaching movement rather than just the top of someone’s head.
Check for obstructions. Tree branches, eaves, porch columns, and downspouts can block the field of view or create blind spots. Many cameras offer 110° to 130° wide-angle lenses, but corners and tight spaces may need a second unit. If the goal is to read a license plate, a dedicated narrow-field camera (around 30° to 50°) works better than a wide-angle model.
Consider power and network access. Wired cameras need access to 120V AC power or a PoE-capable network switch. Wireless models still need charging or a weatherproof outlet nearby. If running cable through exterior walls, locate the nearest interior outlet, attic access, or basement route before committing to a mounting spot. Drilling through brick or stucco without a plan leads to messy patches and frustration.
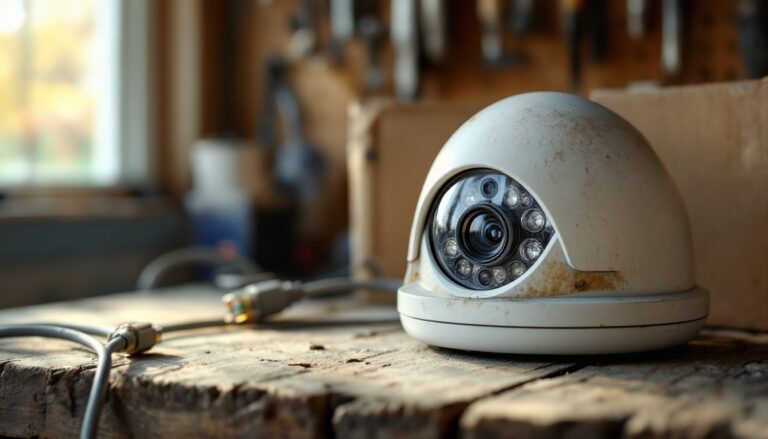
Weather exposure matters. Cameras facing south or west take the most sun and heat. Look for units rated IP65 or higher for dust and water resistance. Mounting under an eave or soffit extends lifespan and keeps lenses cleaner. If installing in a region with winter temperatures below 0°F, verify the camera’s operating range, some models shut down in extreme cold.
Essential Tools and Materials You’ll Need
Most outdoor camera installs can be done with basic tools and a few specialized bits. Here’s what to have on hand before starting.
Tools:
- Cordless drill with bits for pilot holes (1/8″ for wood, masonry bit for brick/stucco)
- Screwdriver set (Phillips and flathead)
- Ladder rated for the working height (extension ladder for two-story homes)
- Stud finder (for mounting to wood siding or finding framing behind fiber cement)
- Wire strippers and crimpers (if terminating Ethernet or low-voltage cable)
- Fish tape or pull wire (for running cable through walls or attic spaces)
- Level (small torpedo level works fine)
- Caulk gun with exterior-grade silicone sealant
- Voltage tester (if working near existing electrical boxes)
Materials:
- Security camera(s) with mounting hardware included
- Mounting bracket or junction box adapter (check if camera includes a universal mount)
- Exterior-rated cable: Cat5e or Cat6 for PoE cameras, or low-voltage cable for analog systems
- Cable clips or conduit (1/2″ PVC conduit recommended for exposed runs)
- Weatherproof junction box (if splicing connections outdoors)
- Silicone sealant (clear or color-matched to siding)
- Lag bolts or concrete anchors (1/4″ x 2″ lag bolts for wood: plastic anchors and screws for masonry)
Safety Gear:
- Safety glasses (drilling overhead throws debris)
- Work gloves (especially when handling cut cable or metal conduit)
- Dust mask (if drilling into fiber cement or old paint)
A second person helps when fishing cable or steadying a ladder, but it’s not strictly required. For homes with vinyl or wood siding, the install is straightforward. Brick, stucco, or stone requires a hammer drill and masonry bits, standard drills won’t cut it.
Step-by-Step Installation Process
With planning done and tools ready, the actual installation breaks into two phases: mounting the camera securely and getting power or data to it.
Mounting Your Camera Securely
1. Mark the mounting location. Hold the camera bracket against the wall at the planned height and use a level to confirm it’s straight. Mark screw holes with a pencil. If mounting to wood siding, try to hit a stud for maximum hold, use a stud finder or knock along the wall to locate framing. For brick or stucco, mark holes and prepare to drill with a masonry bit.
2. Drill pilot holes. For wood, use a 1/8″ drill bit slightly shorter than the screw length. For masonry, use a 5/32″ or 3/16″ masonry bit and insert plastic anchors. Blow out dust with compressed air or a straw, leftover grit prevents anchors from seating properly.
3. Attach the mounting bracket. Drive lag bolts (for wood) or screws into anchors (for masonry) until snug. Don’t overtighten, stripped threads in wood or cracked anchors in brick mean starting over with a new hole. The bracket should be rock-solid with no wiggle.
4. Route the camera cable. Before fully mounting the camera, feed the cable through the bracket’s cable management hole or arm. If the cable exit is on the back of the camera, plan the route now, most installs run cable behind the mounting surface or into a weatherproof box.
5. Attach the camera to the bracket. Most models use a ball-and-socket mount or three-axis gimbal that locks with a set screw. Point the lens toward the coverage area, tighten the adjustment screws, and confirm the angle with a quick test (a smartphone or tablet running the camera’s app works for this).
6. Seal penetrations. Any hole drilled through siding is a potential water entry point. Run a bead of exterior silicone sealant around the cable entry and mounting screws. Smooth with a wet finger for a clean finish. For cable runs that penetrate walls, seal both the exterior and interior sides.
Running Cables and Power Connections
1. Choose the cable route. The cleanest installs run cable through an exterior wall directly into an attic, basement, or interior closet. Locate the entry point closest to the camera and mark it from both inside and outside. Measure carefully, drilling through the wrong spot (like into a fire block or plumbing chase) creates headaches.
2. Drill the entry hole. From outside, drill a 3/4″ hole angled slightly downward to prevent water intrusion. Use a long bit (6″ or longer) for thick walls. If working with brick, drill slowly to avoid cracking mortar. Push a wire coat hanger or the cable itself through to confirm alignment with the interior side.
3. Run the cable. Feed Cat5e or Cat6 cable (for PoE cameras) or the manufacturer’s power cable through the hole. Leave 12 to 18 inches of slack at the camera end for adjustments. Inside, pull the cable to the destination, usually a network switch, NVR (network video recorder), or power adapter. Use fish tape if running through walls or across an attic.
4. Protect exposed cable. Any cable visible outdoors should be enclosed in 1/2″ PVC conduit or secured with UV-resistant cable clips every 12 to 18 inches. Conduit looks cleaner and protects against weather, animals, and accidental damage. For runs along soffits or under eaves, paintable conduit blends in well.
5. Connect power or PoE. For PoE cameras, terminate the Ethernet cable with an RJ45 connector (or use pre-terminated cable) and plug into a PoE switch or injector. Most switches auto-detect and supply 15.4W (PoE) or 30W (PoE+) per port. For wireless or battery cameras, connect the power adapter to a weatherproof outdoor outlet or use the included mounting clip for the charging cable. If no outdoor outlet exists, an electrician can install a GFCI-protected receptacle, this work may require a permit depending on local codes.
6. Verify the connection. Before sealing everything up, plug in the camera and confirm it powers on. Check the app or NVR feed to ensure video is transmitting. Adjust the angle if needed, then lock down set screws and apply final sealant.
Many homeowners discover their smart home setups benefit from centralized control, especially when integrating cameras with existing automation. Product reviews from sources like CNET can help narrow down compatible ecosystems before committing to a brand.
Configuring and Testing Your Security System
Hardware installation is only half the job. Cameras need configuration, testing, and a few tweaks to deliver useful footage.
1. Download the manufacturer’s app or software. Most modern cameras use a smartphone app for setup. Create an account, scan the camera’s QR code or enter its serial number, and follow the pairing process. For systems with an NVR, connect a monitor via HDMI and navigate the on-screen setup wizard.
2. Configure motion detection zones. Default motion detection often triggers on tree branches, passing cars, or shadows. Use the app to draw custom activity zones that exclude driveways, sidewalks, or other high-traffic areas outside the property. Adjust sensitivity, start at medium and tweak up or down based on false alerts.
3. Set recording schedules. Continuous recording fills storage fast. Most systems offer motion-triggered recording or scheduled recording during specific hours. For PoE systems with an NVR, allocate storage per camera, 1TB handles roughly 30 days of motion-triggered HD footage from four cameras, but verify with the manufacturer’s calculator.
4. Enable notifications. Push alerts for motion or sound detection keep homeowners informed without constant monitoring. Some cameras distinguish between people, animals, and vehicles using AI, turn on relevant filters to cut down on noise.
5. Test night vision and image quality. Walk through the camera’s field of view at night to confirm infrared LEDs illuminate the area. Most cameras switch to black-and-white night mode automatically. If the image is washed out, the camera may be too close to a reflective surface (vinyl siding, windows). Adjust the angle or move it slightly.
6. Secure the network. Change default admin passwords immediately. Use a strong, unique password for the camera system and enable two-factor authentication if available. For Wi-Fi cameras, ensure they’re on a secure network, WPA3 encryption is preferred. Some users create a separate guest network for IoT devices to isolate cameras from primary home network traffic.
7. Review local regulations. Recording audio may require two-party consent in some states. Cameras pointed at neighbors’ windows or yards can lead to disputes or legal issues. Angle cameras to cover the homeowner’s property and avoid capturing areas where others have a reasonable expectation of privacy.
Homeowners looking to expand coverage can explore options through camera system deals that bundle multiple units, often at better per-camera pricing than buying individually. Regular firmware updates patch vulnerabilities, so enable auto-update or check quarterly. Test the system every few months, swap out a camera’s position, clean lenses, and verify recordings are saving correctly. A system that worked in July might need adjustment by November when trees are bare and the sun sits lower.
Conclusion
Installing outdoor security cameras is well within reach for homeowners willing to drill a few holes and run some cable. The hardest part is often the planning, getting placement, power, and weatherproofing right the first time. Once mounted and configured, a solid system runs for years with minimal maintenance beyond the occasional lens wipe and firmware update. For anyone still weighing options, placement tips can help finalize decisions before the first hole gets drilled.