Traditional security cameras leave blind spots, literal gaps where someone can slip past unnoticed. A 360-degree outdoor camera changes that equation entirely, delivering full panoramic coverage from a single mounting point. Instead of juggling multiple camera feeds and worrying about dead zones, homeowners get a bird’s-eye view of their entire perimeter. These cameras use fisheye lenses or motorized pan-tilt mechanisms to capture everything around them, eliminating the guesswork from placement and reducing the hardware you need to buy, mount, and maintain.
Table of Contents
ToggleKey Takeaways
- A 360 security camera outdoor eliminates blind spots by delivering full panoramic coverage from a single mounting point, replacing three to four fixed cameras while reducing installation and subscription costs.
- Prioritize IP65 or higher weather ratings, IR night vision with 30–50 feet range, and 2K or 4K resolution when selecting a 360-degree outdoor camera for optimal image quality and durability.
- Mount your camera 10–12 feet high in a central corner location, away from overhead trees and obstructions, to maximize coverage and prevent motion detection false alarms from swaying foliage.
- DIY installation is achievable with basic tools, proper weatherproofing of cable connections, and a stable ladder—most homeowners can complete setup in 1–3 hours without special permits.
- Leverage AI motion detection to filter false alerts and smart home integration with Alexa, Google Assistant, or HomeKit to view feeds remotely and automate lighting for enhanced deterrence.
- Entry-level 360-degree outdoor security cameras start at $80–$150, mid-tier models at $200–$350, and professional-grade PTZ units exceed $400—seasonal sales can save 20–40% on retail prices.
What Makes 360-Degree Outdoor Security Cameras Different?
A standard security camera offers a fixed field of view, typically 90 to 130 degrees. Point it at your driveway, and the side yard goes unwatched. A 360-degree camera uses one of two technologies: a fisheye lens that captures the entire hemisphere in a single frame, or a motorized pan-tilt-zoom (PTZ) system that rotates to cover the full circle.
Fisheye models record everything simultaneously but display it as a distorted circular image that software “de-warps” into usable quadrants. You can digitally pan around the recorded footage after the fact. PTZ cameras physically rotate, offering higher resolution in the direction they’re facing but only one angle at a time unless you set up automated patrol routes.
The practical upside: one camera can replace three or four fixed units. Mount it at a high corner of your home, and you cover the front yard, driveway, walkway, and side access in one shot. That cuts installation time, wiring runs, and subscription costs if your camera vendor charges per device.
The trade-off is image detail. Spreading sensor pixels across 360 degrees means less resolution per square foot compared to a fixed camera aimed at a specific zone. If you need to read a license plate 50 feet away, a dedicated fixed camera still wins. For general perimeter monitoring, spotting motion, identifying people at typical distances, and deterring opportunistic trespassers, a 360 camera delivers excellent value.
Key Features to Look for in Outdoor 360 Security Cameras
Not all 360 cameras handle outdoor duty equally. Pay attention to these specs before you buy.
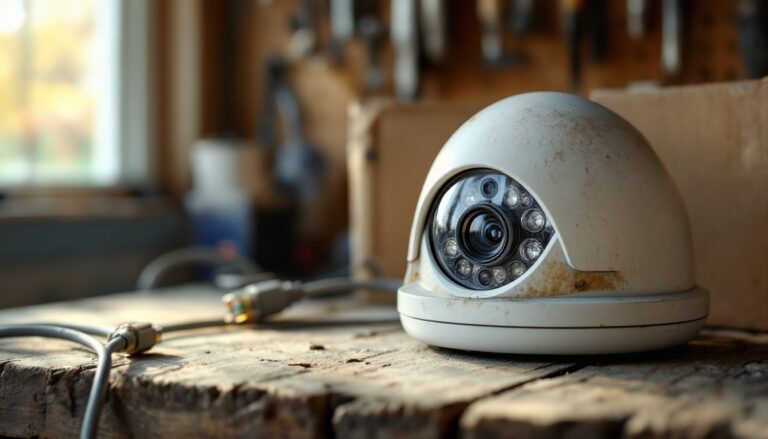
Weather Resistance and Durability
IP rating tells you how well the camera handles dust and water. For outdoor use, look for IP65 or higher. IP65 means dust-tight and protected against water jets from any direction, fine for rain and snow. IP66 or IP67 add protection against heavier spray or brief submersion, useful if the camera sits under an eave that channels runoff.
Check the operating temperature range. Most outdoor cameras work from -4°F to 122°F (-20°C to 50°C), but if you live in the northern U.S. or Canada, verify cold-weather performance. Condensation inside the lens housing will fog your image: quality units include sealed enclosures and sometimes internal heaters.
Housing material matters too. Polycarbonate plastic is common and adequate: aluminum or die-cast metal housings resist impacts and UV degradation better over time. If the camera mounts within reach, vandal-resistant models with IK10 impact ratings can survive a hit from a hammer.
Night Vision and Image Quality
Daylight footage is easy. Night performance separates good cameras from junk.
Infrared (IR) LEDs are standard. They illuminate the scene in wavelengths invisible to the human eye, captured by the camera sensor. Look for cameras with IR range of at least 30 to 50 feet for typical residential yards. PTZ models often push that to 100 feet or more.
Starlight or color night vision uses larger sensors and wider apertures to capture ambient light, streetlights, porch lights, moonlight, so footage stays in color even at night. Many smart home platforms covered by CNET highlight this feature as a premium upgrade. It’s genuinely useful if you need to identify clothing color or vehicle paint in low light.
Resolution starts at 1080p for budget models: 2K (1440p) and 4K options are increasingly common. Higher resolution matters more on 360 cameras because you’re zooming digitally into portions of the frame. A 4K fisheye lets you crop a section and still see clear detail: a 1080p fisheye pixelates quickly.
Check the frame rate too. 15 frames per second (fps) is passable: 20 to 30 fps delivers smoother motion, crucial if you’re tracking someone moving across the frame.
Best Placement Strategies for Maximum Coverage
A 360 camera’s strength is breadth, not depth. Strategic placement multiplies its effectiveness.
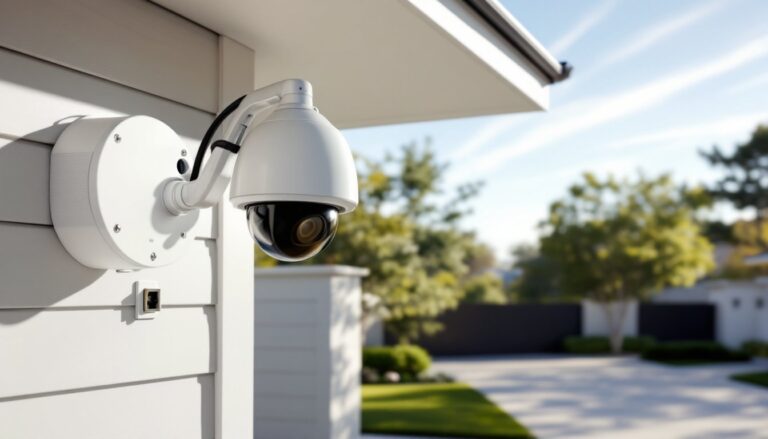
Mount high and central. Corners of your home, under the eave near the roofline, give the widest unobstructed view. Aim for 10 to 12 feet above grade if possible. This height keeps the camera out of easy reach, deters tampering, and reduces ground-level obstructions like bushes or parked cars.
Avoid trees and overhangs directly overhead. Fisheye lenses capture the sky: branches swaying in wind trigger false motion alerts. PTZ cameras waste patrol time scanning foliage.
Consider lighting. If the camera’s IR illuminators are your only light source at night, the effective range shrinks. Position cameras where existing porch lights, garage floods, or streetlights supplement. Motion-activated LED floods paired with the camera extend usable night vision significantly.
Check power and network access. PoE (Power over Ethernet) cameras need a single Cat5e or Cat6 cable run from the camera to a PoE switch or NVR (network video recorder) inside. That cable pulls double duty, power and data. Wireless models need AC power nearby unless they’re battery-powered, which adds recharging chores. Wi-Fi signal strength drops fast through exterior walls and siding: test connectivity before final mounting.
Overlap sparingly. One well-placed 360 camera covers what three fixed cameras would. If your property is large or has multiple access points (front door, back gate, detached garage), place a second 360 unit rather than trying to stretch one camera’s range. Better two cameras with crisp 40-foot coverage than one straining to see 80 feet.
For homeowners comparing setups, recent reviews on Digital Trends emphasize that placement trumps specs, a $200 camera in the right spot outperforms a $500 model aimed at a fence.
DIY Installation Tips for 360 Outdoor Cameras
Most homeowners can handle installation with basic tools. Here’s the process.
Tools and materials you’ll need:
- Drill with masonry bits (if mounting to brick, stucco, or concrete) or standard wood bits for siding
- 1/4-inch and 3/16-inch bits for pilot holes
- Screwdriver or impact driver
- Ladder rated for your mounting height (Type I or IA for safety)
- Cable staples or conduit if running exposed wiring
- Silicone sealant (exterior-grade)
- Voltage tester (if tapping into existing electrical)
- Safety glasses and work gloves
Step-by-step:
-
Plan the cable route. For PoE cameras, run Cat6 cable from the mounting location to your router, switch, or NVR inside. Drill through the exterior wall at a slight downward angle (so water doesn’t follow the cable in). Use a 5/8-inch spade bit for the entry hole. Seal around the cable with silicone once it’s pulled through.
-
Mount the camera bracket. Most 360 cameras ship with a mounting plate. Hold it against the wall or soffit, level it, and mark the screw holes. Drill pilot holes, then drive the provided anchors (plastic sleeve anchors for wood, masonry anchors for brick or block). Secure the bracket with stainless steel screws to resist corrosion.
-
Attach and aim the camera. Connect the Ethernet or power cable before lifting the camera into place, it’s awkward to plug in overhead. Fasten the camera to the bracket per the manufacturer’s instructions. For fisheye models, pointing straight down or angled slightly out usually works best. PTZ units need clearance to rotate: check for obstructions.
-
Weatherproof connections. Even if the camera has an IP66 rating, the cable connection point is a weak spot. Wrap the plug junction with self-fusing silicone tape or slide it into a weatherproof junction box. This prevents moisture creep that corrodes contacts over time.
-
Test before final install. Power up the camera, open the app or NVR interface, and verify the image. Walk the perimeter to confirm coverage. Adjust the angle if needed, most brackets allow tilt or rotation tweaks.
Permit note: Installing low-voltage security cameras typically doesn’t require a permit, but if you’re running new electrical circuits for AC-powered cameras, check local codes. Some jurisdictions require a licensed electrician for anything beyond plug-in devices. For detailed guidance on running cables and mounts, see our home security cameras installation walkthrough.
Safety: Work on a stable ladder with a spotter if you’re above 8 feet. Wear safety glasses when drilling overhead, debris falls straight into your eyes. If you’re uncomfortable on ladders or drilling into your home’s envelope, hire a handyman or security installer. The labor cost is modest compared to a fall or a botched hole that leaks.
Smart Integration and Monitoring Options
Modern 360 cameras don’t just record, they analyze, alert, and integrate with the rest of your smart home.
Cloud vs. local storage: Cloud plans cost $3 to $10 per camera per month for rolling video history (typically 7 to 30 days). They’re convenient and off-site, so a thief can’t steal your footage. Local storage uses a microSD card in the camera or an NVR (network video recorder) on your home network. MicroSD cards cap out around 256GB (about a week of HD footage on most cameras): NVRs with 1TB to 4TB drives hold months. Hybrid setups, local primary, cloud backup, offer redundancy.
AI motion detection filters out irrelevant triggers. Basic cameras alert on any pixel change: wind-blown leaves spam your phone. Person detection, vehicle detection, and package detection use onboard or cloud-based AI to recognize specific objects. Some models distinguish between family members, delivery drivers, and strangers if you tag faces in the app. This feature alone justifies the price jump from budget to mid-tier cameras.
Smart home platforms: Many 360 cameras integrate with Amazon Alexa, Google Assistant, or Apple HomeKit. You can view live feeds on Echo Show, Nest Hub, or Apple TV with a voice command. Two-way audio lets you answer the door from your phone or tell a driver where to leave a package. Integration quality varies, check compatibility lists before assuming your camera works with your existing hub. Budget systems like the Wyze Home Security platform offer basic integration: premium brands go deeper.
Geofencing and automation: Set cameras to arm when your phone leaves a defined perimeter and disarm when you return home. Pair them with smart lights to flip on floodlights when motion is detected after dark, turning your camera into both a sensor and a deterrent.
Professional monitoring is optional. DIY systems let you self-monitor via app: pay $15 to $30/month, and a monitoring center watches your alerts 24/7, contacting you or dispatching police if needed. It’s overkill for many homeowners but worth it if you travel frequently or want backup while you sleep.
Current pricing (as of early 2026) ranges from $80 to $150 for entry-level 360 cameras with basic features, $200 to $350 for mid-tier units with 2K resolution and AI detection, and $400+ for professional-grade PTZ models with 4K, extreme weather ratings, and advanced analytics. Regional sales and bundles, check security camera discounts periodically, can knock 20% to 40% off retail, especially around major holidays.
Installation takes 1 to 3 hours per camera depending on cable routing complexity and your comfort level. Plan an afternoon, not a quick errand. The payoff is a perimeter security upgrade that’s visible, effective, and surprisingly affordable.