Security cameras have evolved from grainy, pixelated footage that barely identified a person’s shirt color to ultra-high-definition systems that capture facial details and license plates from across a driveway. At the heart of this evolution is resolution, and 12-megapixel (12MP) cameras represent the sweet spot between image quality and practical storage needs for most homeowners. Whether you’re monitoring package deliveries, tracking wildlife that keeps raiding the garden, or adding a layer of security to vulnerable entry points, a 12MP camera delivers detail that lower-resolution systems simply can’t match. This guide walks through what makes 12MP cameras worth considering, where to install them, and how to set them up without needing a professional installer.
Table of Contents
ToggleKey Takeaways
- A 12MP security camera captures approximately 4,000 x 3,000 pixels—four times more detail than 1080p HD—enabling clear identification of license plates, facial features, and text from 30+ feet away.
- 12MP cameras generate larger video files (40-60 GB daily per camera), so implement motion-activated recording and H.265 compression to reduce storage needs by 70-90% without sacrificing quality.
- Prioritize 12MP camera placement at front entry points, driveways, and garages 8-10 feet high and angled downward; avoid backlit locations and verify Wi-Fi signal strength before installation.
- Essential 12MP security camera specs include at least 20 fps frame rate, IP66/IP67 weather resistance, Power over Ethernet (PoE) for reliability, and a minimum illumination under 0.01 lux for strong low-light performance.
- Hybrid storage combining local microSD or NAS drives with cloud backup provides the best balance of long-term retention and off-site protection for 12MP camera footage.
- Modern 12MP cameras with AI analytics (person, vehicle, and package detection) significantly reduce false alerts and future-proof your system for 5-10 years of reliable security coverage.
What Is a 12MP Security Camera and Why Does Resolution Matter?
A 12MP security camera captures video or still images at approximately 4000 x 3000 pixels, which translates to roughly four times the detail of a standard 1080p HD camera (2MP). To put that in perspective, 1080p cameras capture about 2 million pixels per frame, while a 12MP sensor grabs 12 million. That extra data means you can digitally zoom into footage after recording without turning faces into pixelated blobs.
Resolution matters because security footage is only useful if you can actually identify what, or who, triggered the recording. A 12MP camera allows homeowners to capture fine details like text on a package, the make and model of a vehicle at the curb, or distinctive features on a person’s face from 30+ feet away. Lower-resolution cameras struggle once you zoom in or try to identify objects beyond 15 feet.
But, higher resolution isn’t always better for every situation. 12MP cameras generate significantly larger video files than 2MP or 4MP models, which impacts storage needs and network bandwidth. If your internet upload speed is sluggish or you’re relying on cloud storage with data caps, that’s a consideration. But for critical coverage areas, front doors, driveways, gates, or anywhere you need forensic-quality detail, 12MP is hard to beat.
One technical note: not all 12MP cameras perform equally. Sensor quality, lens sharpness, and image processing all play roles. A cheap 12MP camera with a poor lens and weak processor can produce worse images than a well-engineered 4MP model. Look for cameras with larger sensor sizes (1/2.3″ or larger) and quality optics from known manufacturers.
Key Benefits of Choosing a 12MP Security Camera for Your Home
The primary advantage is detail retention at distance. A 12MP camera positioned 25 feet from your driveway can capture a license plate clearly enough to read every character, even if the vehicle is angled. That level of detail becomes critical if you ever need footage for insurance claims, police reports, or neighborhood watch coordination.
Another benefit is wider effective coverage per camera. Because 12MP sensors capture so much detail, you can cover a larger area with a single camera and still digitally zoom into specific zones during playback without losing clarity. This can reduce the total number of cameras needed for comprehensive property coverage, potentially offsetting the higher upfront cost per unit.
Facial recognition and AI features also perform better with higher-resolution input. Many modern 12MP cameras include on-board analytics, person detection, vehicle detection, package detection, that rely on image clarity to reduce false alerts. A camera that can distinguish between a person and a tree shadow at 40 feet is going to save you from dozens of useless notifications.
Finally, there’s future-proofing. Display technology keeps improving, and 4K monitors are now standard in many homes. A 12MP camera’s footage looks sharp on modern displays, while older 1080p footage can look soft or blocky. If you’re investing in a security system you plan to keep for 5-10 years, 12MP ensures your footage won’t look outdated halfway through that lifespan.
Essential Features to Look for in a 12MP Security Camera
Resolution alone doesn’t define a good security camera. Start with field of view (FOV), most 12MP cameras offer between 90° and 120° horizontal FOV. Wider angles cover more ground but can distort edges: narrower angles provide more detail in a focused zone. Match the FOV to the install location: wide for covering a yard, narrow for monitoring a specific entry point like a side gate.
Frame rate is another critical spec. Many 12MP cameras default to 15 frames per second (fps) to manage file sizes, but that can produce choppy footage if someone’s moving quickly. Look for models that support at least 20 fps at full 12MP resolution, or that can switch to 4K (8MP) at 30 fps for smoother motion capture.
Weather resistance is non-negotiable for outdoor installs. Check for an IP66 or IP67 rating, which indicates protection against dust and heavy rain. Cameras rated lower than IP65 shouldn’t be exposed to direct weather. Also verify the operating temperature range, if you’re in a region with sub-zero winters or triple-digit summers, make sure the camera is rated for those extremes.
Power options matter more than many DIYers realize. Power over Ethernet (PoE) cameras are the gold standard for reliability, single cable carries both data and power, and there’s no battery to maintain. Wireless cameras offer easier installation but require either frequent recharging or a nearby outlet, and Wi-Fi can introduce lag or dropouts if your router’s overloaded.
Finally, consider local vs. cloud storage. Cameras with onboard microSD slots (supporting at least 128GB) give you storage independence and no monthly fees. Cloud options offer off-site backup in case the camera is stolen, but typically come with subscription costs. According to product testing from independent reviewers, hybrid systems with both local and cloud options provide the best balance.
Night Vision and Low-Light Performance
A 12MP camera is only as good as its ability to capture detail in low light. Most models use infrared (IR) LEDs for night vision, with effective ranges between 30 and 100 feet depending on LED count and power. The trade-off: IR footage is black-and-white, which can make identifying colored objects (like vehicle paint or clothing) difficult.
Starlight or color night vision cameras use larger sensors and advanced processing to capture color footage in near-darkness. These are ideal for well-lit areas like porches with ambient street lighting, but they cost more and still switch to IR in total darkness.
Check the camera’s minimum illumination spec, measured in lux. Anything under 0.01 lux is considered excellent low-light performance. Also verify whether the camera has smart IR, a feature that adjusts LED intensity to prevent overexposure when objects are close to the lens. Without it, you’ll get washed-out footage if someone walks up to the camera at night.
Best Locations to Install Your 12MP Security Camera
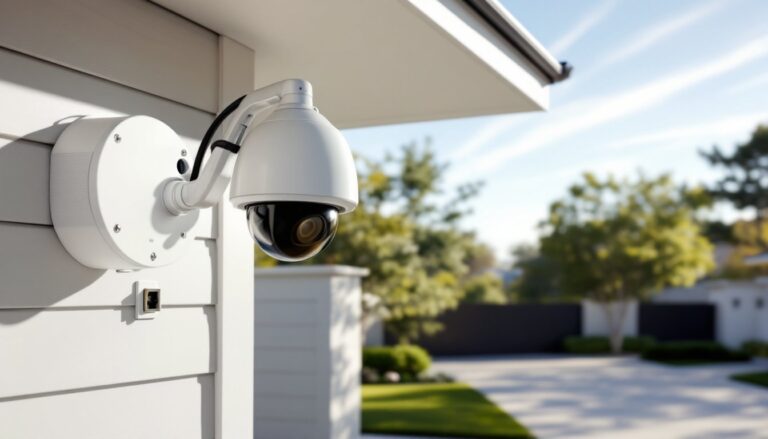
Front entry points, doors, porches, and driveways, are top priorities. Position a 12MP camera 8-10 feet high, angled slightly downward to capture faces rather than the tops of heads. Too high and you’ll get great shots of hats and hoods: too low and the camera becomes an easy target for tampering.
Side gates and alley access are often overlooked but represent common entry points for break-ins. A camera here should have a narrow FOV focused on the gate latch and pathway. If the area is poorly lit, prioritize a model with strong IR range or consider adding a motion-activated floodlight.
Garage doors and vehicle parking areas benefit from 12MP resolution because you’ll want to capture license plates, vehicle damage, or packages left near cars. Mount the camera to cover both the garage door and the approach path. Angle matters, plate capture works best when the camera is nearly perpendicular to the vehicle’s path, not looking down a long driveway at a steep angle.
Backyard coverage depends on property size. For smaller yards, a single 12MP camera with a wide FOV mounted on a rear corner of the house can cover the space. Larger properties may need multiple cameras or a PTZ (pan-tilt-zoom) model, though PTZ cameras add complexity and cost.
Avoid installing cameras where they’ll face direct sunlight during key hours, backlit footage washes out detail. Also consider Wi-Fi signal strength if using wireless models. A camera at the edge of your property might have stellar FOV but terrible connectivity. Run a signal test with your phone before drilling mounting holes.
DIY Installation Tips for 12MP Security Cameras
Start with a site survey. Walk your property and mark potential camera locations with tape or chalk. Check each spot for Wi-Fi signal (if wireless), power access, and sightlines. Use your phone’s camera to preview the approximate view from each position.
For PoE cameras, you’ll need to run Cat6 Ethernet cable from your router or PoE switch to each camera location. Cat6 supports the bandwidth required for 12MP streaming and can carry power up to 328 feet. Outdoor-rated cable (direct burial or UV-resistant) is essential for exposed runs. If you’re running cable through walls or attics, a fish tape and patience will be your best friends. Drill entry holes slightly larger than the cable diameter and seal with silicone caulk to prevent water intrusion.
Wireless cameras are simpler to mount but require either battery access or a nearby outdoor outlet. If hardwiring to an outlet, use a weatherproof electrical box and GFCI protection. Never run indoor extension cords outside, they’re not rated for UV or moisture exposure.
Mounting hardware varies by surface. For wood siding or trim, use stainless steel screws long enough to hit a stud or blocking (typically 2.5-3 inches). On brick or stucco, you’ll need a masonry bit, plastic anchors, and appropriately sized screws. Pre-drill all holes to prevent cracking.
Many homeowners struggle with camera angle. A good rule: the camera lens should point at where you expect a person’s chest or face to be at the farthest point of coverage. Test the view using the camera’s app before fully tightening mounts, most brackets allow 180° of swivel adjustment.
Safety warning: If you’re installing cameras above 10 feet or near power lines, use a stable ladder with a spotter. Falls are the leading cause of DIY injuries. Wear safety glasses when drilling overhead, and gloves when handling cut cable ends.
Following proper installation procedures ensures your cameras stay secure through storms and provide years of reliable coverage.
How to Maximize Storage and Manage 12MP Video Files
A single 12MP camera recording continuously at 20 fps can generate 40-60 GB of footage per day, depending on compression settings. That means a 1TB hard drive fills up in about 16-25 days with one camera, and faster with multiple units. Managing this data requires a strategy.
Motion-activated recording is the simplest solution. Cameras only record when they detect movement, reducing storage needs by 70-90% in typical residential settings. The trade-off is that you won’t have coverage of periods with no motion, which can miss slow-moving events or gradual changes. Most modern cameras allow you to set detection zones to ignore areas with constant movement, like trees swaying or street traffic.
H.265 (HEVC) video compression cuts file sizes roughly in half compared to older H.264 encoding without noticeable quality loss. Verify that both your camera and recording device (NVR or computer) support H.265. Some budget systems claim 12MP resolution but only encode in H.264, which defeats the storage efficiency.
For local storage, use NAS (network-attached storage) drives rated for continuous operation, not standard desktop hard drives. Surveillance-grade drives like Western Digital Purple or Seagate SkyHawk are designed for 24/7 write cycles and run cooler. A 4-camera setup should start with at least 2TB of storage if recording motion events, or 6-8TB for continuous recording with a 30-day retention window.
Cloud storage services typically charge $3-10 per camera per month for 7-30 days of retention. It’s convenient and provides off-site backup, but costs add up quickly with multiple cameras. Some manufacturers offer free limited cloud storage (24-48 hours) with premium tiers for longer retention.
According to technical evaluations from major review platforms, the most reliable approach combines local storage for bulk retention with cloud backup for critical cameras like front doors. This gives you long-term local access without paying for cloud storage on every camera.
Consider whether you’ll want to retain footage long-term. If you’re monitoring construction projects, wildlife, or time-lapse changes, archive important clips to a separate external drive monthly. This keeps your active storage clean while preserving key recordings.
For DIYers on a budget, leveraging seasonal security camera discounts can make stepping up to 12MP systems more affordable without sacrificing storage capacity.